Forms start with the Base plan. On Free the “Form” item in the menu carries a plan label, and a form added earlier is visible to viewers but can't be sent.
Open the slide in the editor
Pick the slide that needs the form — usually the last one.
Add the form
In the bottom bar, open “More blocks” and choose “Form”. A slide can hold one form. If the slide's layout has no room for a form, the slide switches to a layout that does.
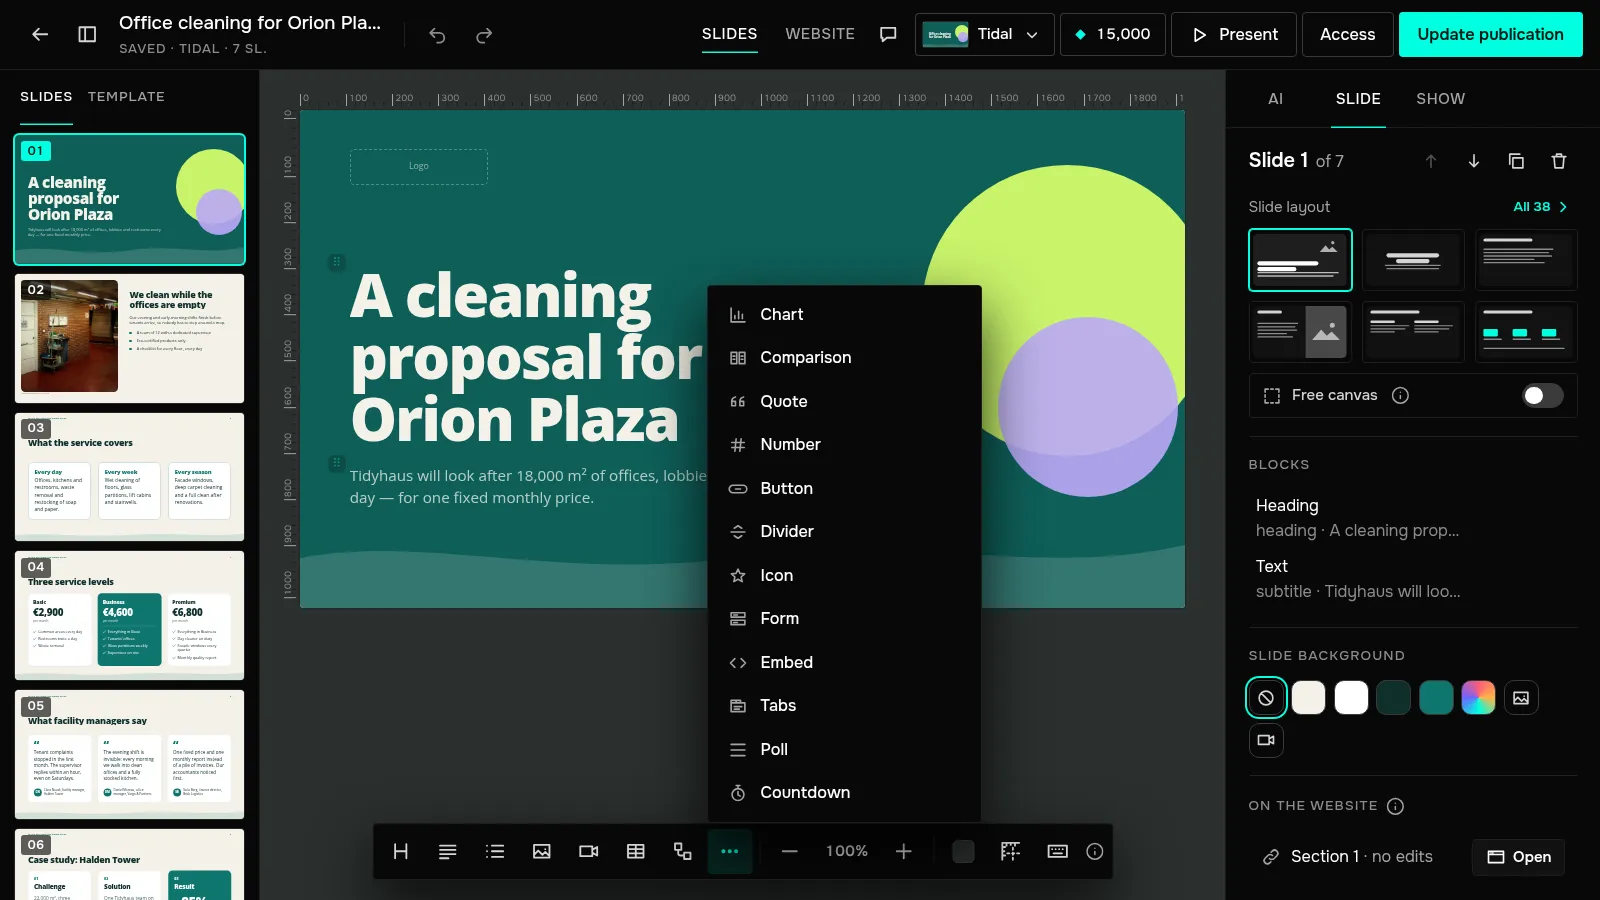
Set up the fields
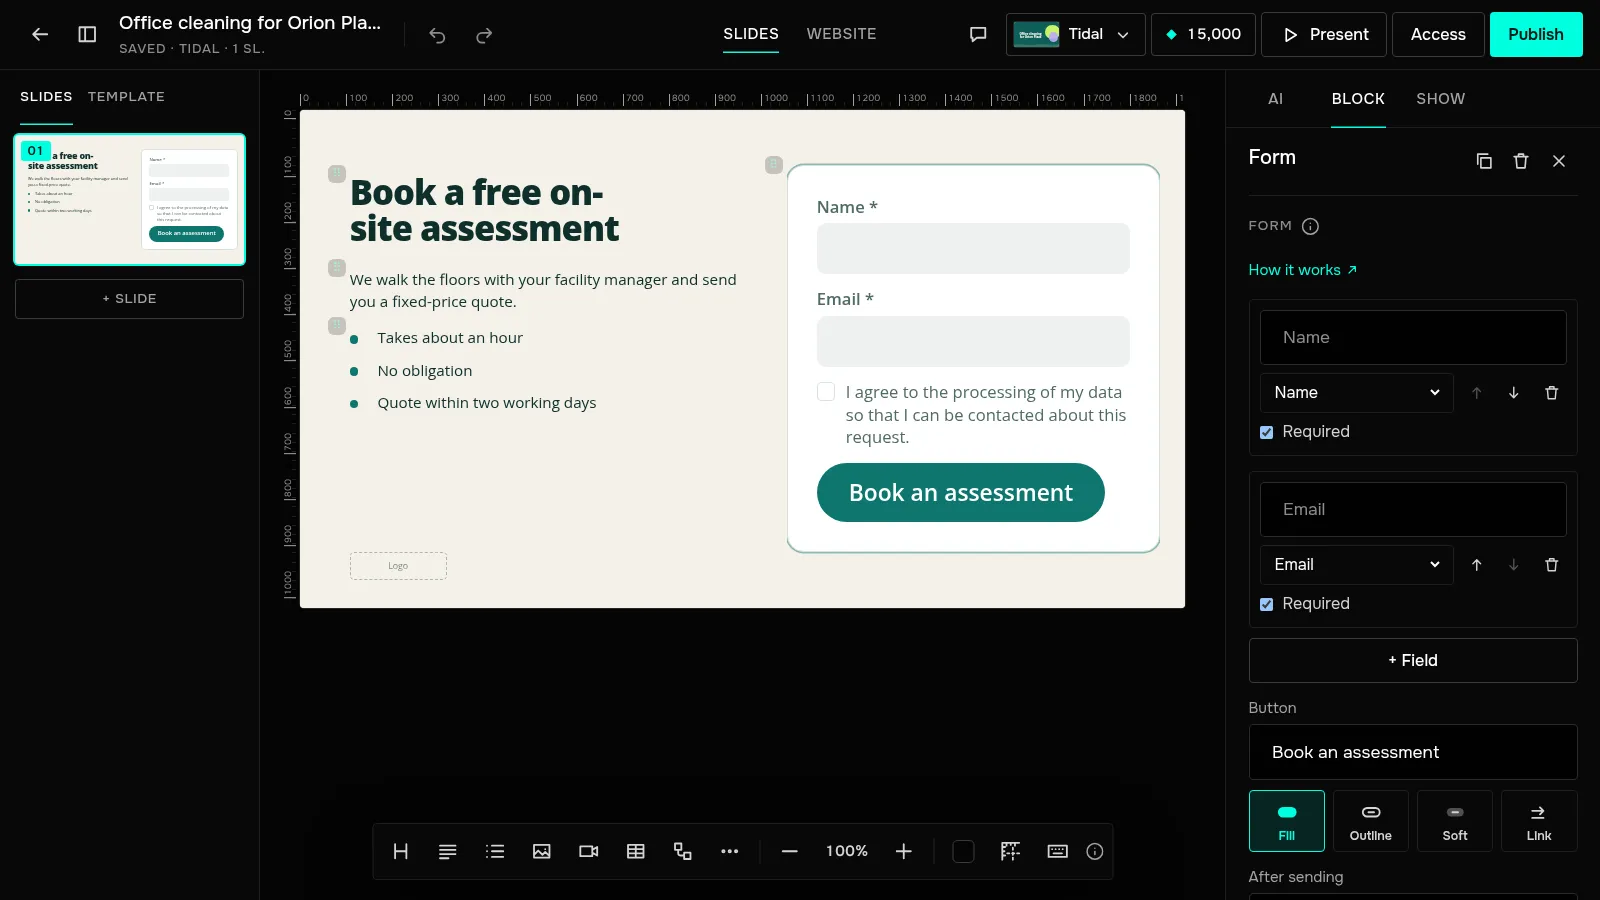
The “Form” panel opens on the right. A new form asks for a name and an email. Use “+ Field” to add your own — up to six in total: “Name”, “Email”, “Phone”, “Text” or “Dropdown”. Tick “Required” where an answer is a must. Below the fields you can change the button text (“Button”), the reply viewers see (“After sending”) and the “Consent text”.
Publish the presentation
Click “Publish” or “Update publication”. The form accepts requests on the published page — on the slides and on the website, from a computer or a phone. In Preview the form doesn't send. Requests appear under the presentation's “Requests” tab and in your inbox.
This is how the form looks to a viewer:
Creating a presentation from text? On the plan step, turn on “Add a request form” and the form is placed at the end of the presentation for you.